Low-Cost 3D Printers
In this project, we were interested in how to design reliable and low-cost 3D printers through exploration and analysis of existing open-source designs.
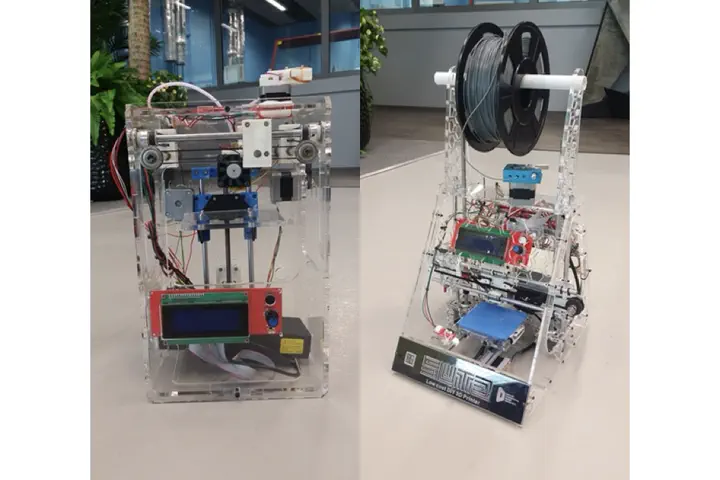
As case studies, we built and tested three open-source designs to compare their advantages and disadvantages, and to gain insights into developing improved designs. We developed two prototypes (shown in the figure above) from our analysis of the case studies and user needs.
Role
This project was part of the Undergraduate Research Opportunities Programme in SUTD where I worked with fellow undergraduates Cai Ruihe, Lum Shi En and Poh Juzhong.
I assisted in:
- Constructing the case study 3D printers
- Designing and fabricating the two prototypes which were demoed in Singapore Maker Faire 2015
Process
Case Studies
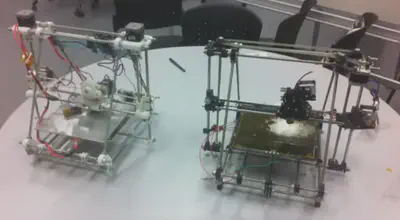
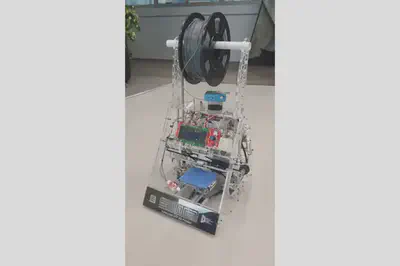
Three open-source designs were built: Prusa Mendel (Iteration 2 and Durbie), Kossel and Metal Reviser. The Prusa Mendel (Figure 1) was selected as it was a popular and commonly-used design in do-it-yourself (DIY) communities. It acted as our datum design for comparison with the others. The other two were selected due to their structural design and stability (related to reliability) and low number of parts (related to lower costs).
Prusa Mendel
The Prusa Mendel was a Cartesian machine that moved along X, Y and Z axes. The end effector (part in which the filament extruded from) in the middle portion moved on the X and Z axes, while the printer bed at the bottom moved on the Y axis.
The frame consisted of 3D-printed parts and threaded rods which were held together with M8 (8mm) nuts and washers. The Prusa Mendel extruder was directly mounted on the end effector.
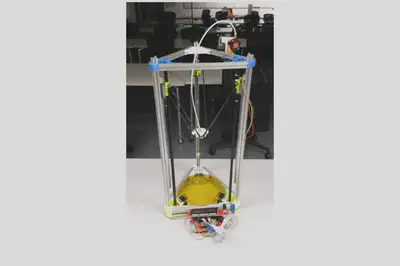
Kossel
The Kossel had a Delta mechanism that consists of parallel rods that move along three linear axes. The parallel rods are attached to rail pieces, as the stepper motors turn, the timing belts move the rail pieces vertically. As this happens, the end effector piece in the center will stay parallel to the printer bed and will still move in the X, Y and Z axes.
The frame consisted of 3D-printed parts and aluminum square frames. The extruder was a Bowden extruder design in which the feeder for the filament and the heated nozzle were separated. Only the nozzle was attached to the end effector.
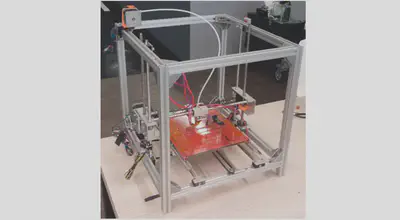
Metal Reviser
The Reviser had a Cartesian mechanism, similar to the Prusa Mendel. The frame consisted mainly of aluminum square frames and brackets. It also used a Bowden extruder.
Findings
In terms of frame design, we found that:
- 3D-printed parts with threaded rods on the Prusa Mendel were not reliable as parts were prone to cracking and the M8 nuts would come loose over time.
- Aluminum square frames in the Kossel and Reviser were more reliable but more expensive than the Prusa Mendel.
In terms of extruder design, we found that:
- Directly-mounted extruder on the Prusa Mendel was prone to wear over time and slipping issues.
- Bowden extruders on the Kossel and Reviser were energy efficient and faster than the directly-mounted extruder as they reduce the load on the rods and therefore lower the current/power needed for the stepper motors to move the end effector.
Development of Final Prototypes
Needs Analysis and Comparison
From our case studies as well as feedback from 3D-printer users and makers, a prioritised list of six user needs were formed (Figure 4).

We compared the Prusa Mendel (datum) with the Kossel, Reviser and three other designs (Tantillus, H-Bot and Smartrap) in relation to how well they met the user needs. The results are presented in the Pugh Chart below (Figure 5).
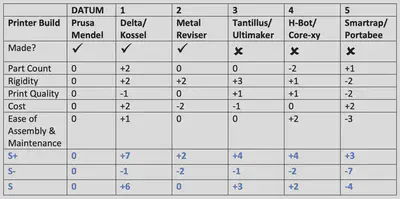
The Tantillus and Prusa designs were chosen as the basis of our final prototypes: Tantillus Remake and Prusa ver Cimple. Although the Kossel had a higher overall score and was more affordable than the Tantillus in the Pugh Chart comparison, the Tantillus had the highest rigidity score as well as higher durability and print quality than the Kossel. The cost of the build and number of parts could be modified through redesign. The Prusa maintained as our datum and modification of this popular design could provide a contribution to the DIY 3D-printer community.
Concept
A key design goal was to improve the reliability and durability of the printer. From our case studies, we decided not to use 3D-printed parts or aluminum for the frame and instead use 6mm laser-cut acrylic which can be both sturdy and affordable.
Another goal was to reduce the cost of the printer. We aimed to achieve this through the standardisation of parts. The Tantillus Remake and Prusa ver Cimple were made of the same parts. This decreases the variety of non-printed parts like electronics and rods that were purchased.
Tantillus Remake
The Tantillus Remake (Figure 6) was modified from the original Tantillus, which had a 3D-printed frame, to have a laser-cut acrylic frame. I designed a few of the modifications for improving the printer’s reliability: rails and bed support for the Z axis, the extruder and fan mount. Initial sketches were made for each design. From which, their 3D-models were designed on Solidworks and 3D-printed.
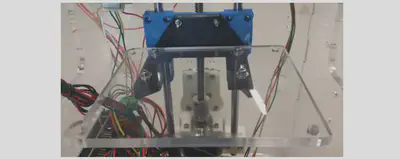
Z Axis Rail and Bed Supports
Two smooth rods were used as the vertical guides for the Z axis bed piece to stabilise it during prints (Figure 7).
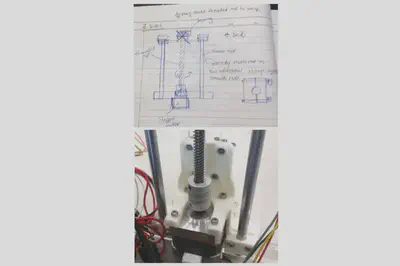
Initially, the Z bed bracket was made of three separate pieces which were press-fit into each other. This lowered the strength of the bracket. Thus, the bracket was modified to provide more structural support to the Z bed and was made as a single piece (Figure 8).
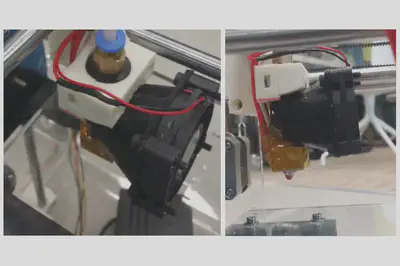
Extruder
The filament feeder mechanism in the Bowden extruder was modified to incorporate the use of rubber bands instead of springs to provide its gripping force (Figure 9). Rubber bands are readily available, affordable and allows the user to control how much force is on the filament. This provides an advantage to many spring-type designs where the force on the filament is non-adjustable.
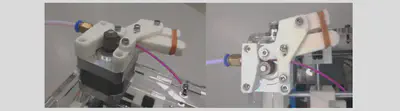
Fan Mount
From our print tests with the Tantillus Remake, we noticed warping in the prints. There was likely insufficient cooling of the hotend (nozzle and heat sinks). A fan mount was developed (Figure 10) to funnel air directly towards the heat sinks of the hot end to prevent overheating and expansion of filament within the PTFE tube in the hotend. The mount was designed to be clipped onto the heat sinks, making it simpler for assembly and maintenance.
Prusa ver Cimple
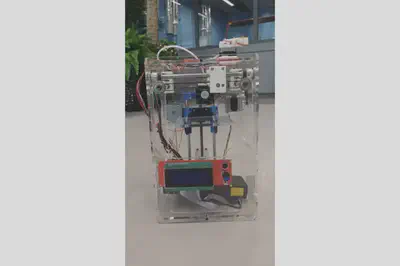
The reworked Prusa (Figure 11) had a laser-cut acrylic frame instead of 3D-printed parts and threaded rods. The design files for Prusa ver Cimple is available on the RepRap repository for open-source 3D-printer designs
Samantha Chan
Postdoctoral Fellow
I create wearable, AI and digital interfaces to enhance human cognition and memory at the MIT Media Lab.